Home Design Work Recognitions For Sale About Me

Saturday, April 30, 2011

I'm gettin' NO DP for Christmas.... (JB18)


Hey there! I hope you are having a good Saturday, I am busy BUSY this weekend, so I figured I'd get this done first thing, so I didn't run out of time. This is for the challenge at Jingle Belles this week, which is to use NO DP (designer paper)/patterned paper on your project! **GASP** This is a tough one for me, I always use patterned paper! Also, I realized after my card was done, I didn't use any punches either, that is a total departure from the norm for me, lol!

So, I made a light blue card base and a red mat and I dry embossed an olive piece of cardstock for the main panel. I did use my trick where I brayered ink on the embossing folder to give it that extra richness and dimension. I really like that look, and it's such an easy technique.

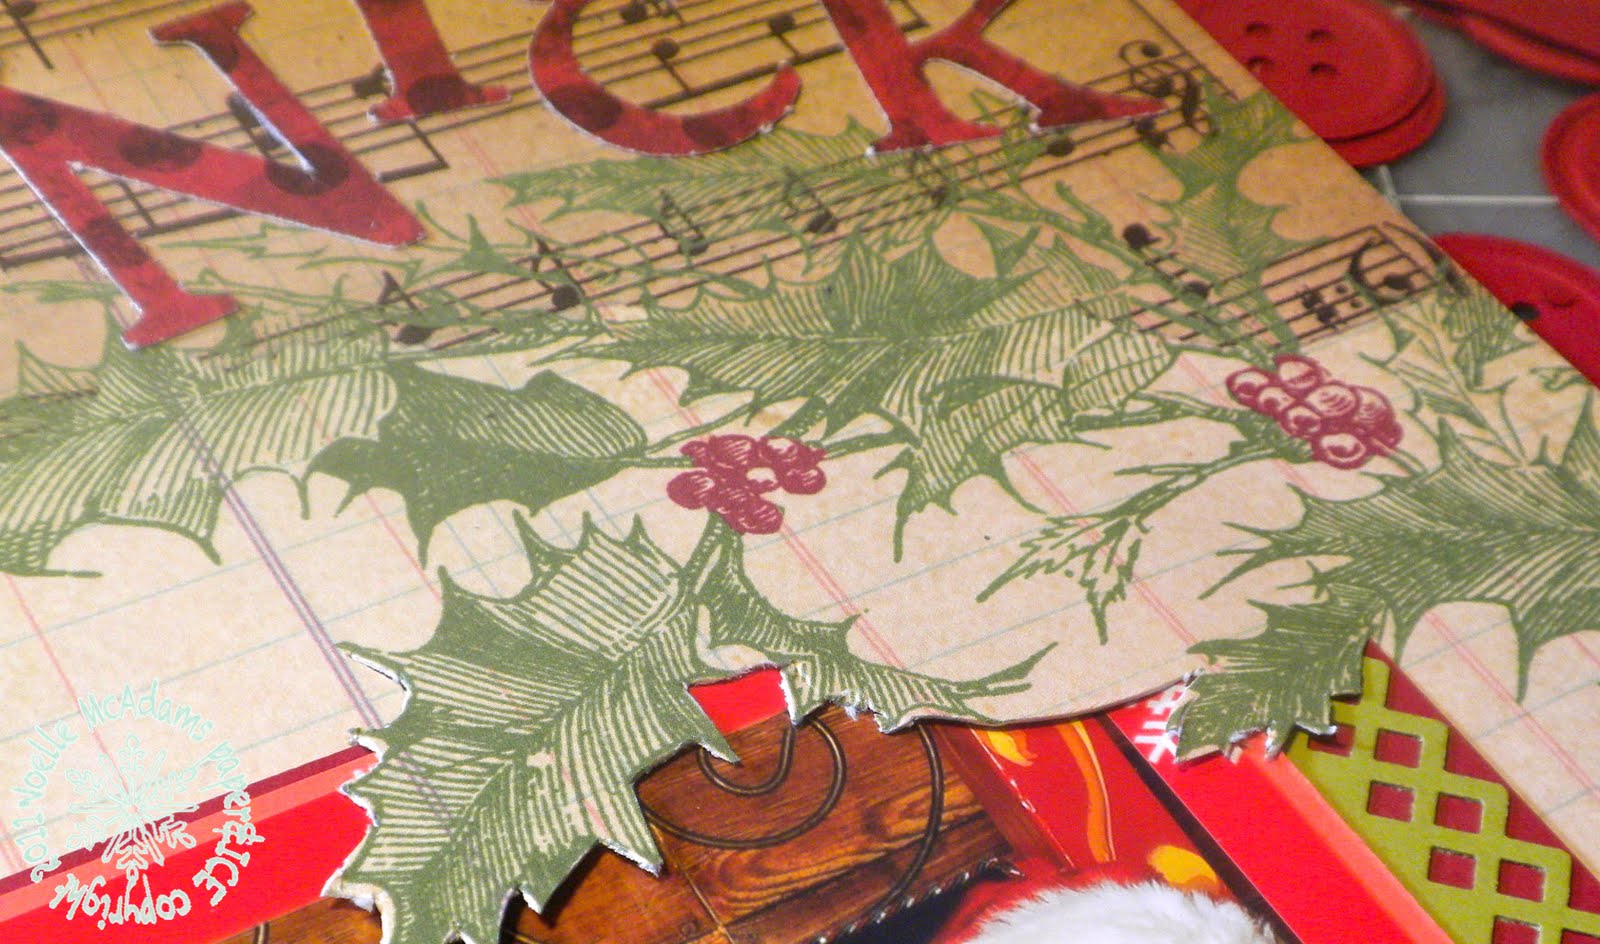
Close up on the flower.
The blue panel was made using a layered stamping technique that I LOVE. Sometimes you will see this technique called a "Joseph's Coat" technique and it's a wonderful technique to use if you want a patterned paper look, but don't have the right color DP, etc. So, in this case I took a white rectangle of cardstock, and I stamped it all over with the "be merry" sentiment in olive ink.

Then (and this step is IMPORTANT with this technique!) I rubbed my Embossing Buddy/ static bag all over the white stamped piece. If you do not have an Embossing Buddy, or static bag, or if you do not have ANY clue what gibberish I'm talkin' here, sprinkle some cornstarch or baby powder on the cardstock and make sure it covers the whole piece. then just tap it off, like you would glitter or flocking powder. (As a side note, if you have a sewing machine, you could make your own Embossing Buddy/Embossing Magic/static bag by using a loose weave fabric and filling it with cornstarch, and closing it up like a teeny pillow, voila!)

ANYWAY, I digress, back to the technique! Then stamp the tree down in Versamark or other clear ink. Heat emboss it with clear powder. So, you now have a CLEAR tree on top of a stamped panel that is still white. Ink a brayer up with light blue ink. Roll the brayer all over the white, and after you roll over the tree a few times, you'll start to see it resist the blue. When you have saturated the card to your desired shade of blue with the brayer, take a tissue and wipe the tree off, just any ink that might still be on there from the brayer. And that's a great resist technique you should try at home!

For embellishments, I used some ribbon that matched along the top, and I made a layered poinsettia with some stamps from the same set. I stamped a red solid poinsettia on red cardstock and cut it out. Then I stamped a dotted poinsettia on clear acetate in a brown StazOn ink and cut that out. I adhered them together and added a gem on top. And that's my card, have a super weekend! -Noelle


PS: Still trying to reach my goal of 60 followers by my blog anniversary in May. I'm only 4 shy, so if you like my work, I'd LOVE it if you joined me! Thanks.


Supply list: stamps: Inkadinkadoo; solid cardstock and ribbon in Real Red, Old Olive, and Bashful Blue:SU!; inkpads in same colors: SU!; red gem: Martha Stewart Crafts; embossing bag; Versamark inkpad; StazOn inkpad in brown; embossing folder: Cuttlebug; rubber brayer  

DUST IT OFF!: Embossing folders work even cooler with some ink brayered on :) Try making a card with no DP, you might be surprised with how cute it turns out!

Friday, April 29, 2011

Tips for mass producing cards/Retirement Party Invitations

Hi there! I just finished these invitations for my Mom's retirement party & as I was finishing them I was thinking of how many announcements and invitations I've created over the years. It's not unusual for me to be making 20, 30 or even more cards at a time. I even made my brother's wedding invitations (100!) Of this particular one I made 20, but you may remember a few weeks back, the Bowling Party Invitations I made a few weeks ago. I made 30 of those. I was thinking back today, to several years ago when I first started doing this, and some of the trial and error that I experienced. So, just in case you are on the verge of creating many invitations or announcements for an event; I wanted to share some tips and tricks I've found when designing a card to be reproduced several times. Here we go! :)

1. Consider the cost: If you decide to use, say a 99 cent 3D sticker on each of 40 invitations, that's going to drive up your cost pretty high.... I usually stick to solid cardstock, inexpensive patterned papers, punches, stamps and dies when mass producing cards, because I already have them on hand. Similarly, if you're only making 6 invitations, it may not be financially feasible to justify a 25$ stamp set in a theme you may not use again. Digi stamps and clip art are a WONDERFUL option for mass production as they come in hundreds of themes, and are normally not more than a couple dollars. Also, like my bowling cards, inexpensive stickers are a wonderful option as well.

2. Consider the waste: Say you create a card using a certain designer upholstered brad. 12 brads come in each package, but only 4 per package are in the colors you need. You're making 40 invitations, so you buy 10 packages of the brads. Suddenly, you have EIGHTY designer brads left over that may not be in a style or color that will be easily used up later. Additionally, considering the waste goes for cutting your papers. If you are using a piece of patterned paper for an A2 card front, and you decide to make each piece 4 1/8" wide, you've just taken the pieces you can get from a 12" paper from 6 down to 4. Chances are 1/8" isn't going to make that much of a difference in the look of your card, but will prevent you from having large amounts of waste/scraps later on.

3. Mailman friendly: If you're making multiple cards, the odds are that you are going to have to mail at least some of them, right? You may have noticed that I LOOOOOOVE buttons! Love love love them:) However, buttons aren't the greatest for mailing. You either need to use a padded envelope or somehow ensure that the card doesn't go through that big canceling machine at the post office. Did you notice that the button on this card is made from cardstock? This button was punched out, so it will lay flat for mailing. Also, that ensures I can have 20 buttons all the same without buying a thing.

4. The computer is your friend: The sentiment on this card is done with the computer, printed out and then die cut. I rarely do that for a single card, I use stamps. The same goes for the information on the inside of the card or announcement, I always use the computer for that. For an A2 sized card, you should be able to get 4 card "insides" per sheet of 8 1/2" by 11" paper. You can print them, cut them out and adhere to the inside of your cards with minimal waste and minimal time. Plus there so many fun, FREE fonts out there these days, you should be able to find something that suits your card.

5. Time spent: When I am making a single card, I have no problem spending an hour making handmade flowers, hand stitching, using some fancy folding or doing an involved stamping technique. But, lets be real; if you are reproducing a card 40 times, you simply can't spend 1 hour per card, it will just take too darn long, and you'll end up having to compromise your design to finish the job. That old acronym KISS really applies here! Keep it simple, and you'll manage your time much better.

6. Assembly Line: Now, I can't explain why this is true, but I have learned through the years, that the FASTEST way for me to mass produce cards, is to make each piece separately and then assemble the cards. I HAVE tried making each card start to finish and then the next one, and so on. But for some reason, it just takes SO much longer than assembly line style. so, for this card, I cut all the card pieces out of the selected colors. Then I stamped all the blue card fronts, then I colored them all, then I punched and assembled the layered strip, then printed and die cut the clouds. Finally I punched all the buttons and tied them. It does go a lot faster this way, and another thing I've learned is that, if I'm doing something sort of mindless (ie punching out several paper buttons) I can do that in front of the TV with my family, sometimes the boys can even help with things like that! :)

7. Choose elements that are easily and affordably reproduced: I touched on this above, but another element of this card that was a choice that would be easily and affordably reproduced was the bakers twine. I designed my card around the red bakers twine (instead of a different color) because I knew I had a HUGE spool of it! I only have a small card in blue, green, orange and yellow, so it made sense and was cost-effective to choose the red in this case.


WHEW! A lot to remember, I know, but I hope this helps some folks. Trust me when I say I speak from experience, and that's the experience of making mistakes! Trial and error has made me a well-oiled machine when it comes to multiple cards, and I hope this knowledge can help YOU! Thanks for checking out my blog! Have a great day:) -Noelle

Supply list: solid cardstock & stamps: SU!; punches: EK Success; woodgrain paper and button punch: Martha Stewart Crafts; bakers twine: Crate and Barrel; cloud die: MFT

DUST IT OFF!: Who CARES if those cute stamps are retired, so is my Mom! :)

Wednesday, April 27, 2011

Java Junkie (TCPTUES156)

Clip on cup holder

Coffee Canister


Hey there! I was SOOOOO excited about the coffee themed challenge at  TCP Tuesday that I ended up making TWO projects this week! Besides, I love to make useful things for around the house that are cute as well, so this challenge seemed to fit the bill for me to get out of a card rut and move onto some 3D items. I am SUCH a coffee junkie, there was NO WAY, I'd miss out on this challenge!! I never miss my morning cuppa whether at home or when I splurge at Starbucks once or twice a week.

This week is also Jenny's first time being the Hostess with the Mostess for the challenge, and you MUST click on that link and go see the adorable cup cozy she made, it's just too cute! :)

Cup holder before makeover
holding the cup
Well, like I said, I did two projects. This first one was a clip on cup holder I found over at Bed Bath and Beyond this morning. I thought this was a really clever idea for a gadgety type thing, and that it might actually prevent me from spilling my precious Starbucks all over my desk while working, too! But it started out UGLY, here's what it looked like, not so cute, huh? so, I covered it in a woodgrain paper and made a little stamped accent with one of my fave TCP stamps Like You a Latte.

Isn't this little guy just the cutest? Reminds me of one of my boys, except none of them would be caught dead in such a fashionable coat! LOL ;) I think I'm getting better at coloring the hair with the Copics, it turned out pretty cute. I also made a circular piece to cover where the cup sits. I used my labelmaker to spell out "I'll hold your cup!" as well as some divine twine in Blueberry and a yellow button. Here's some more shots of it:


Next project, a coffee canister for my kitchen! I originally thought I might give this away because I don't use much ground coffee anymore since hubby and I splurged on a Keurig earlier this year. But now I'm not sure I can part with it! I used the super versatile A Beary Good Year set on this, gotta love PJ the Bear! 


I found this David Letterman coffee quote online and thought it was just too funny! So I used my messing around with multiple font trick to make it look like a stamp and printed it on some patterned paper. I colored, paper pieced and fussy cut PJ out and attached him to the quote. I made a fancy background from some die cut pieces, some Divine  Twine, and a button to accent. I also used the coffee cup stamp and punched a small circle out and adhered it to the indentation on the clasp of the canister with some dimensional glaze.

Finally for the top, I used some Basic Grey sticker letters to spell out "Coffee" and accented it with that little coffee cup stamp and another button and some twine.
On the inside of the lid I used some more of those stickers to spell out "have another cup" and some punched pieces and the coffee cup stamp again, I got ALOT of use out of that one tiny stamp! 

Top of canister
Well, that is it for me today, I need to go cook dinner for my family! :) Hope you have a stellar day!
-Noelle

SUPPLY LIST: stamps:TCP; bakers twine in blue and purple: TCP; patterned papers: Martha Stewart Crafts, SU!, K&Company, American Crafts, MME, Cosmo Cricket; Crystal Effects dimensional glaze:SU!; punches: EK Success; circle cutter: CM; buttons:SU!; dies: Spellbinders and Sizzix; letter stickers: Basic Grey; markers: Copic; labelmaker: Dymo; yellow gems: Martha Stewart Crafts
Inside of lid


Recycled Christmas Card (JB17)

Hi There! I made this card this afternoon for this week's challenge over at Jingle Belles, and then I went to check out the deadline, and I think I missed it by 20 minutes! Ack! I gotta pay better attention to these things, LOL;) The challenge was to reduce, reuse and recycle, so here's my card: The die cut piece is a cereal box that was die cut and then I brayered ink onto an embossing folder and dry embossed it. The "patterned paper" is the front of the Christmas bulletin from church. The red tulle was off some flowers my hubby brought me in December, it was so cool, I HAD to save it, but this is the first time I've used it. The sentiment label was one I made for another card a while ago and ended up not using because I decided I wanted a different sentiment. and finally the bottle cap is from a soda. I always save those. In the bottle cap I put a punched piece of scrap paper and some dimensional glaze, and I added that little rose. I have no idea where that is from. I found it on the floor of my studio one day, I'm sure it's from an embellishment or button pack, but which one? I haven't a clue! That glittered reindeer is a sticker that was left over from last years Christmas cards. So, I guess this whole post is "DUST IT OFF!" today! I hope you like it & I'll go comment on Jingle Belles and see if I can get anyone from over there to come and see, even though I missed the deadline. Have a great day! :)

-Noelle


Tuesday, April 26, 2011

Muir Woods scrapbook layout (CQC #82)


Hey there! It's Tuesday and that means time for another colourQ challenge! The colors this week are: Always Artichoke, Kiwi Kiss, Pear Pizzaz, and Baja Breeze. Blues and greens, my very favorite, you know! :) I saw a similar tree in the current issue of Scrapbooks, Etc. page 29 (June 2011 issue) if you want to see my jumping off point. When I first saw these pics, I was thinking more dark, woodsy, looking pages. but then this page started to take shape and I love the way it turned out! Besides, lets be real, I still have 30+ pics left from this day, so, I'm sure I can give dark and woodsy a shot somewhere along the way too! LOL  ;) 


So, I've been keeping up on this lawsuit between Cricut and Makes the Cut. Cricut won and Makes the Cut has been shut down, they are no longer able to sell the software, where you can use your Cricut to cut True Type fonts and SVG files, many of which you can get for free online. I believe Cricut is also in a lawsuit with Sure Cuts A Lot also (a similar software). I had been looking into these kinds of software for awhile and had several friends with SCAL who really loved it. So, I sensed the window of opportunity might be closing, and I purchased SCAL about a week ago. This page was my first foray into using it. Both the tree trunks and the tree shaped letters were cut using SCAL, both were free downloads as well, pretty cool, huh? I'm still getting the hang of the software, and probably will never use it's full capabilities where you can draw your own designs to have your Cricut cut them. Digital drawing intimidates me! 

See the bracket shaped piece on the first page, accenting my photo mat? That was actually the strip you normally cut off the paper, that shows you what the pattern on the other side of the paper looks like? Yeah, I decided it would be a great accent to my photo mat, here's what it looked like before I cut it:

I love these color challenges, because it forces me to rummage through my old stash looking for stickers and accents in just the perfect colors! There are some REALLY old stickers on this page, feels so good to use them! :)
Well, that is it for me today, or as my Papa would have said, "That's all she wrote!" I hope YOU have a stellar day, and, if you pop by once in awhile, would you do me a favor and follow this blog? I'm trying to get my total number of followers up to 60 by my first "Blogoversary" which is in a little less than a month. I'm at 53 now, so only seven to go! I'd love to have you join me, thanks.  :)

-Noelle

supply list: cloud patterned paper: American Crafts; letter stickers: MME; solid cardstock and corduroy brads: SU!; patterned scraps for tree circles: K&Company and MME; punches: EK Success; leaf & tree stickers: Sticko; "perfect" and "memories" stickers: K&Company; quote sticker: ki memories; glitter buttons: Recollections; epoxy stickers: Sticko; Cricut and SCAL software; Top Note Die: SU!; resin flower: Prima; "Imagine" sticker: Daisy D's; journaling stickers: Simply Luxe

DUST IT OFF!: Use a strip that you would have thrown out and cut a design off of it (or punch it!), like I did with my bracket. The quote sticker, the"Imagine" sticker and journaling stickers are really old, also I used scraps to punch out my tree circles. 


Monday, April 25, 2011

What do you do with all those plastic eggs?

 So, it's the day after Easter. If you are like me, you are likely crashing today because you're not accustomed to eating so much sugar. If, also like me, you had a big Easter lunch at your house yesterday, for oh, say 23 people, you may have a plethora of plastic eggs left over from the Easter egg hunt. What to do with all those eggs is the question? Now, I fully admit to reusing the kids' Easter baskets, and plastic eggs every year. But yesterday left me with more that I could ever use, so I came up with a couple fun crafts. The great thing about these, is that, if you do any crafting at home at all, you likely already have everything you need to get started. Here we go!

This first one was my idea, and one that came to me when I was in bed last night. The plastic eggs have holes in the top. In fact, these ones I had (from Target) had 2 holes in the top and two in the bottom of each egg. That made this craft really easy! I decided to make a little Easter countdown garland that I will use for the boys next year. Using a large needle and a thin craft ribbon, I threaded the ribbon through the tops of 10 plastic eggs. I numbered the eggs with some number stickers I already have, but if you don't have some, you could use a Sharpie to write the numbers on the eggs. I added scraps of ribbon ties in between the eggs and accented the eggs with some adhesive felt rick rack, but none of that is necessary, I just had some leftovers from my Easter cards for this year. I added some die cut bunnies to either end of my garland (again, leftovers). I figure, next year, I can put 3 pieces of (sugarless!) gum in each numbered egg, or those little plastic party favors, or other small items as a countdown to Easter, which, we'll just start 10 days out. That works well, since Easter falls on a different date yearly.  Turned out pretty cute, dontcha think? :)


This next craft, is a great one to use up both eggs and letter stickers. If you (or someone you know) has a preschool or toddler aged child, this is a great one, and then the eggs can be used all year! What you do is make a game where you put the upper case letter on the top of the egg, and the lower case letter on the bottom and then have your child try to match the 2 up. I mixed up the colors on my set (making the tops different colors from the bottoms) because Ev is 3 1/2 and already knows his letters. (Yes, I'm a proud mom!) But if your child is younger or just starting to recognize letters, it would make it easier to have the tops and bottoms match in colors as well as the letters. I saw this idea over at Playing House. They have several other good ideas as well, check it out! Another great blog for ideas on what to do with those eggs is Modern Parents Messy Kids. Check it out! :) Here's my set of letter eggs for you to see. Again, I was using leftover stickers, so the eggs are all different.

Well, that's it for me today! Thanks to all my new followers! I'm still trying to get to a total # of 60 followers by May 21, so if you like what you see, I'd LOVE to have you join me! :)

Have a stellar day!
-Noelle

supply list: Plastic eggs, letter and number stickers, ribbon scraps, adhesive felt rick rack: Martha Stewart   Crafts, bunny die cuts: K&Company

dust it off!: Use up those eggs you might have pitched as well as scraps of ribbon and those half-used sheets of letter and number stickers!


Sunday, April 24, 2011

Happy Easter! (MOJO187)

Happy Easter! I hope you all had a very blessed day! :) I had the big family gathering at my house today, it was really fun! There was a beautiful church service this morning, and I think the stress of the last year is finally starting to wane. Both my friends with cancer have had clear scans recently! Yea! :) I do still have some friends who are having trouble, and I made this for one of them. This is following the sketch over at Mojo Monday 187. This is a departure from much of what I've been doing lately. Darker, richer, and some copper thrown in for good measure.

I had picked up these hand made papers several weeks ago, as my nearby Xpedx was going out of business, and they had all their stock at 40% off. No brand on these, but they sure are pretty! I used solid cardstock in Rich Razzleberry, Elegant Eggplant, Ivory, and a copper metallic. This sheer ribbon was the only one I had that would work on these papers, though I wish I'd had something in satin that was a little wider. The button is from my reclaimed jar. I think that's it for today! 

1 Peter 1:18-19 

18 For you know that it was not with perishable things such as silver or gold that you were redeemed from the empty way of life handed down to you from your ancestors, 19 but with the precious blood of Christ, a lamb without blemish or defect.

Have a blessed week!
-Noelle

supply list: stamps: Verve; punches: EK Success; solid cardstock:SU!; purple gems: K&Company; copper cardstock: Bazzill

DUST IT OFF!: Punches, and those old buttons and scraps of ribbon, you never know when they'll come in handy! :)


Thursday, April 21, 2011

Hide the eggs! (TCPTUES)


Hi there! I hope you all are doing well this week. I have been a busy little bee, getting ready for Easter and organizing/purging all over the house: closets, drawers, bins, etc. "Spring cleaning" as it were. It feels good to get the house in better order, but I have been SOOOOOO busy! I did want to get to this week's TCP Tuesday 155. I haven't gotten to play over there in a couple weeks! Leigh is the hostess this week, and you have got to click on her name there, and go see her A-MAZING, adorable card! So so cute! :) Anyway, it's a sketch challenge this week, and here is the sketch: 
I made my card a long card, or what I call a "legal" sized card, because it fits in a legal sized envelope. It's 3 3/4" x 8 1/2." I needed one more Easter card, so I got to use my VERY favorite TCP Easter set. I decided the long card would be a fun opportunity to stack some things up. In case you haven't noticed, I really like to stack things!  Anyone remember my layered cake card? LOL :) So, I used my oval punch to create some eggs for the mama hen to sit on. I stamped the sentiment on the bottom egg. I made my chicken from a MME yellow gingham paper. For the patterned paper in the background, I used a new piece with musical notes on it and a fancy die-cut border from Sassafrass Lass, too fun! I thought the musical notes would be cute for the bird. This card was just crying out to be sewn on, so I caved and dragged out my sewing machine. I dream of the day I have a space big enough to work where I could leave it out all the time. Not much more to this card, a resin flower and some fun, striped ribbon complete the look. 

I was super thrilled to see my Frosty card featured over at Jingle Belles today! That card made me smile, so I was so glad to see other folks felt the same! :) 

If you pop by regularly & like my work, please consider following? I am ONE MONTH away from my first blog anniversary, and my goal is to have the total # of followers to 60 by that point. I am currently at 48 from all sources, so only 12 to go, I'd LOVE it if you'd join me :)

Well, signing off! Have a wonderful day! xoxox -Noelle

supply list: stamps: TCP; patterned papers: MME and Sassafrass Lass; oval punch and solid cardstock: SU!; striped ribbon: Michaels generic; resin flower: Prima

DUST IT OFF!: I love my trusty oval punch, and it always works overtime at Easter :)

Tuesday, April 19, 2011

Happy Easter Bunny (CQC #81)


Happy Tuesday, all! That means it's time for another week at colourQ!!!! A sweet Easter-y color scheme this week: Pink Pirouette, Soft Sky, Old Olive, Daffodil Delight, and white. I had these sweet Easter die cuts and mini pillow stickers from K&Company. The bunny layered die cut is glittered too, it's just so sweet! :) I cut an oval and dry embossed it. There is a decorative stamp stamped behind the green "Easter" sentiment in the pink, if you look very closely you can see.  This is a larger card than my norm, it's 5"x7" I hope you like it! Go check out the gorgeous projects my DT buds have for you at CQC and have a WONDERFUL day. 

-Noelle

Supply List: patterned paper, pillow stickers and bunny die cut: K&Company; punch: EK Success; felt rick rack sticker: Martha Stewart Crafts; punch: EK Success; oval cutter: Creative Memories; embossing folder: Cuttlebug; stamps: Inkadinkado; solid cardstock and inkpads: SU!

DUST IT OFF!: The oval cutter and dry embossing folder


Monday, April 18, 2011

Do you see her? (card at the bottom of post)

 This is my front door. Do you see her?


A closer look. See her there behind the candle?


Look at this beautiful little nest she constructed, a little miracle of life on my front door.


And, new life to come, for you, this Easter week:) 


A card inspired by "my" bird:) Hope you like it!

supply list: stamps:Inkadinkado; laser cut paper, gems, bees and ticket: K&Company; markers: Copic

Have a stellar day, I'll post pictures after they hatch:)

-Noelle 


Saturday, April 16, 2011

Frosty the snowman (JB16)

Hi there! Still looking for my mojo, so I decided to give a new challenge a try, and think I may have found it, at least for this card:) My birthday is on Christmas, and I am one of those annoying people who really gets into the holiday (sorry, Scrooges!) I also have a HUGE collection of snowmen, which live all over my house from November until early February. So, my thinking was, make a Christmas card, one with a snowman, thereby incorporating two things I love and maybe just maybe find that spark again? So, I DID have fun! :) I've never played at Jingle Belles before, but the blog has such a cool concept, I'm sure I'll be back! Create a holiday card every week, and then by the time Christmas rolls around, you've got enough to mail out for the year. Very cute & what a GREAT idea to help ease the holiday rush, right? This is also a cross-over challenge at Betty Bees Buzz.

Ok, so my card, I've been dying to ink up this cute little snowman from Inkadinkado. I stamped him in black Memento ink on white cardstock (I like Neenah brand) and then I colored him with Copics. I added some white flocking powder and Diamond Stickles to his hat and a little more Stickles to his scarf. The challenge at Jingle Belles was to use die cuts, so I die cut him and then sponged ink all around him before removing the die. I used a lot of MME Holly Jolly papers from last year. I die cut a larger green piece in the same shape, and also die cut a rick rack piece which I moved over on the die and ran through again to make it thinner. I die cut a solid red rick rack piece as well to mat the dotted rick rack. For the sentiment I used a silver chipboard "S" I found in my old stash. I used a die cut sticker and felt snowflake behind it. For the "now" I used some old red flocked letter stickers, from the same sheet as the die cut sticker behind the "S." A final touch was 3 green glittered buttons around the corners of the die cut.

Well, I hope you like my card! Have a wonderful day:)
-Noelle


supply list: stamp: Inkadinkado; white cardstock: Neenah; markers: Copic; snowflake and solid cardstock in Cherry Cobbler and Wild Wasabi: SU!; patterned papers: MME; chipboard letter with rhinestones: Amanda Blu; flocked stickers: sei; flocking powder: Inkadinakado; green glittered buttons: Recollections; Diamond Stickles; nesting dies: Spellbinders; rick rack die: MFT

DUST IT OFF!: the rhinestone letter, felt snowflake and the flocked stickers.

Thursday, April 14, 2011

Kid Bot Birthday Cards


Hey all! I had a couple of kids birthday cards to make, so I ended up just repeating the same design twice, doing one vertical and one horizontal card (still missing my mojo, as per my earlier post). 

I found this cool paper with the numbers on it in my MME Stella and Rose 6" paper stack, isn't this SO cute? The first card I made, the one with the number "five" spelled out is for my nephew, Thomas. You may remember Thomas' bowling birthday party invitations I just finished up here. When it came to the second card, I did NOT have the right letters in those red brads to spell out the word "Eight" so I decided to put the boy's name on the card instead. My son, Collin and Jack have been best friends since kindergarten. 
So, pretty simple cards, overall. I stamped my robot down on white cardstock and colored with Copics. I die cut the robot and die cut a mat from coordinating MME paper (though, I believe that paper was from a different 6" stack than the number paper was from). I used some red letter brads to spell out the "five" and the "Jack." I put some mini letter stickers down to spell out birthday and then the final touch was some baker's twine wrapped around the card several times and tied into a knot. I also put an epoxy sticker over each child's age on their respective cards:) 

Well, that's all for today! Hoping I find my mojo and finish my million projects:) Have a great one! :)

-Noelle

Supply List: patterned paper: MME; stamp and solid cardstock in Cherry Cobbler and Basic Gray:SU!; red letter brads: The Paper Studio; mini letter stickers: Cosmo Cricket; epoxy stickers: Sticko; baker's twine: Crate and Barrel; markers: Copic; dies: Spellbinders

DUST IT OFF!: Those red brads have been around awhile, as well as those epoxy stickers.


Tuesday Trigger

Where oh where has my mojo gone? Where oh where can it be? Hey all, sorry you have not seen much of me lately. I'm trying to get 1 million things done, and I fear, not doing very many of them very well at all! Oy. Totally exhausted and I've had a headache for a week! So, I decided I needed a "want to" kind of project today, so I decided on the Tuesday Trigger at the Moxie Fab World. I couldn't resist the lovely Trigger this week, Great jumping off point, and putting me in a place to do some new stuff too, that's always good! So, here's my card: I used these GORGEOUS new papers I am in love with: Que Sera Sera by K&Company. Lovely colors and fabulous implied layers on these fab papers, I am smitten. Watch out, this could turn into one of those things like I went through recently with the MME Stella and Rose papers! But the papers were the perfect colors for the Trigger too, so it all worked out in my favor;)

Here's the Trigger:
I started thinking I should do this to my porch when I saw it! I already have a rocking chair like that, and I LOVE painted furniture, I can't tell you how many old furniture pieces I've picked up and then painted, I love that! These are FAB colors too, love it:) So, for my card, I pulled from this Trigger: The colors, the red frame of the mirror, the red paint, all the layers of color and texture AND the glass. The shine of the mirror and the windows add such a clean edge to the photo composition. Also, you see some of the shapes here making an appearance on my card, there's the scallop-y square of the pillow and the rounded rectangle with curves of the dresser.

So,  the center embellishment was the big work and the "meat" of my design. I started out with a glass microscope slide, which I stamped a happy Birthday stamp on in brown StazOn ink. Then I stamped the flower stamp on Turquoise in the same color ink, you can get a better look here.... I punched that out and layered it underneath the slide.

Then I took a shaped chipboard piece and painted it red, that was my "frame." I threaded some yellow ribbon through the holes of it, once it dried, and tied a bow. Finally I layered some more paper I'd die cut.

The card base is super simple. It's a legal sized "long card" (8 1/2" by 3 3/4") I made a turquoise base and matted my fab paper in yellow after sandwiching a punched border in between. I did use the flower stamp twice in red before I laid down my fancy center embellishment.

Well, that's it for right now! I've gotta make some kid birthday cards, so hoping I'll be back soon with some more (and hoping my mojo returns?) Have a great one! :)

-Noelle

Supply List: flower stamp: Inakdinakdo; punches: EK Success; red gem: Martha Stewart Crafts; patterned papers: K&Company; dies: Spellbinders; chipboard: Melody Ross; solid cardstock in Poppy Parade, Daffodil Delight, Tempting Turquoise and birthday stamp: SU!; yellow ribbon; microscope slide; brown StazOn ink

DUST IT OFF!: The scalloped square punch, the yellow ribbon and the slide are all old:)

Tuesday, April 12, 2011

Christmas in April? (CQC80)

Hey there all! Time for another color challenge at colourQ!!! LOVING the colors this week! Cherry Cobbler, Kiwi Kiss, Tangerine Tango, and Kraft. I selected my sons' Santa photo from last year for the challenge this week. Even though bringing the orange into this page was a wee bit tricky, I think it worked out ok! :) The border around the photo itself (there with the 2010 and the snowflakes on it...) was  a very BRIGHT orangey-red. If you are a Stampin' Up! color aficionado like me, it was almost a Poppy Parade shade of red, and that's why I really felt it would make the orange work on the page, tying that border in to the rich, deep Cherry Cobbler red.


So, I used a technique on this page that' I've used a lot through the years. I cut a decorative slit in the patterned paper, following the pattern of the holly in this case. Then I slipped the corner of my photo underneath that edge that I cut. Here's a little photo tutorial:
1. Lay photo down on patterned paper and mark along
the edges of holly where you want to cut. I usually just
put a little hole in the paper with my craft knife.

2. Using craft knife, cut along edge of pattern between the two spots you've marked.

3. Add adhesive to back of photo and slip corner of photo under slit that you have cut

4. Repeat as desired

5. Finished product

6. Back of page looks like this with edges peeking out the back.

  Ok, so the rest of my page. Isn't this paper great? I rarely do a single layer of cardstock for my base, but this really didn't need anything else, it was so cool with all that printing on it, that I really didn't feel it needed any more layers! I pulled my title together with a variety of stickers. The letter stickers making up the words "Jolly" and "St." are flocked (and very old), fun! The "Nick" was cut on my Cricut, little letters with tag holes in the top, so I added some decorative brads to the tops. I matted my photo in the Tangerine, Cherry Cobbler and a punched Kiwi Kiss border. That glittered candy piece is actually a gift tag I sprayed with some acid free spray. If you love something, save it, right? A few fancy snowflake stickers, a felt snowflake embellished with a Kiwi punched snowflake and a orange glittered brad, some red gems on the holly berries, and an old journaling block, and we are good to go!


I hope you like my page! Have a wonderful day & I hope you'll come play over at colourQ this week! I'd love to see what YOU do with these colors! I roam around and comment on the submissions, BUT if you leave a comment here, I'll be SURE to come check it out! :) -Noelle

supply list: background paper: making memories; flocked letter stickers: sei; journaling block:Cosmo Cricket; mini letter stickers: BoBunny Press; Base Camp Cricut Cartridge; felt snowflake, markers, & solid cardstock: SU!; snowflake punch: Martha Stewart Crafts; border punch: EK Success; fancy snowflake stickers: K&Company; orange glitter brads: American Crafts; christmas brads: unsure maybe The Paper Studio?; craft knife:Xacto; candy gift tag: Target; archival mist; deep red dotted paper (Nick): MME; red gems: Hero Arts

DUST IT OFF!: Ah, the oldies but goodies on this page...... Let's see, the journaling block, all the letter stickers, the felt snowflake, the snowflake punch and the Christmas brads are all really old. That candy tag is reclaimed too, I saved it from one of the boys' Christmas presents we gave them last year.