Home Design Work Recognitions For Sale About Me

Wednesday, July 27, 2011

Catch Up on a Latte (MFTWSC30)


Hi there! Just a fun, quick card today for this awesome sketch over at My Favorite Things Wednesday Stamp Club! Have not played over there in awhile, so it felt SOOOO good to dust off my cute MFT stamps and dies. Here's the sketch!


Great sketch, huh? I could do several more cards with this one if only I had more time! :( I decided to use my rick rack die  instead of my scalloped one for the ruffles. Also used my rolled rose die for the flower, which i cut from yellow felt and stitched together with the cutest plaid button. I colored the stamped image with Copics and punched her out. Just a fun, pretty easy card with loads (probably too much, but you know me!) patterned papers :) 


Well, that is all for me today! Hope YOU have a great weekend & I'll be back early next week to show you some more fun stuff! :)

xoxox, Noelle

supply list: dies and stamps: MFT; punches: EK Success; DP: Echo Park, Oriental Trading, BasicGrey, button: Crate Paper; twine and solid cardstock: SU!; markers: Copic


Tuesday, July 26, 2011

HOOT! (colourQ #95)


Hi there! I hope you all are well:) We had a wonderful weekend at a family reunion! My mom and stepdad set the whole thing up, it was at this lovely place called Glen Eyrie. There is a really cool castle there and gorgeous red rocks and huge trees. A very lovely, peaceful place for a reunion. And it was so great to see everyone! Some people I hadn't seen in over 15 years! Super fun & even though our little Ev was pretty sick and my hubby's car broke down, we had a great time anyway. Got home late last night and now playing catch-up, another busy week ahead! The good news is, boys back to school in LESS than a week! I will miss THEM, but not the constant fighting and tattling! ;) 

Well, this card is for this week's colourQ! Some of the new Stampin' Up! InColors are in this one, good thing my pack of new cardstock and inks came while I was gone! The colors are: 

Island Indigo, just **might** rival Pacific Point for me! A bit more sophisticated, but still that rich blue, LOVE IT! I am liking this year's InColors better than last years. More my speed, I guess... 
So, I took the owl cue from the inspiration pic, too. Isn't this the cutest cookie jar? I made a long card, and border punched the edge. Then I matted some old SU! DP onto a mat in the coral color. I used the pennant punch (also new SU!) to make pennants for the top and bottom of the card, then used letter stickers to spell out "friend." For the center, I used the owl punch to build a little owl and a retired stamp for the sentiment. Added a few gems to accent the pennants, and that was it. I hope you like my card! Off to finish some more work before poor little Ev wakes up from his fever-induced nap. :( Poor baby. 

Chat soon! xoxox, Noelle

supply list: all supplies are Stampin' Up! EXCEPT: border punch and giant circle punch: EK Success; letter stickers: Authentique; DP for owl vest: MME

Friday, July 22, 2011

Snowbody Shaker Card (JB30)


Hi there! You should be proud! I'm playing an extra challenge TWO weeks in a row! LOL ;) This is for the O-HOLEy Night! challenge at Jingle Belles this week! I really love that challenge, you should check it out if you haven't! I love it because making Christmas cards makes me just a **smidgen** happier than making regular cards, so silly I know, but I'm a Christmas baby! It's my holiday, I can't help it! Also, everyone who plays is really friendly as are Lauren and Stef. so come and PLAY! :) 


So the challenge this week is to make a window card! I made my window into a shakerbox, I used to LOVE making shaker cards & I haven't made one in years, so it was time to dust off the old skills in that arena! I started out by making a green card base with a red mat on it, & I used a corner rounder on all pieces. Then I went to make the shaker, here's how you do it:

1. Punch (or die-cut) a hole in the front panel/piece of your card, I DID NOT punch a hole through the green base or the red mat, just the snowflake DP. Tape acetate to the backside of your panel with the punched hole, covering the hole. 
2. Using small pieces of foam tape, cover the backside of your paper, just going around the edge of the hole you've created. On this card I did 2 layers of foam tape. I usually think one layer is not quite thick enough, but you can experiment.
3. Before removing the backing on the top layer of foam tape, fill your box up with whatever you want to fill it with. I used silver microbeads here, but mini buttons, beads, or confetti work well. I'm not a fan of glitter, though, because it tends to stick the acetate. 
4. Remove paper backing from tape, and adhere your image piece to the tape (in this case I used a white heat embossed snowman). 
5. Add more foam tape to the bottom of the panel, so it's all the same thickness, adhere to card and embellish. 


Another tip is that I use leftover acetate from sticker sheets. As you finish a sheet of stickers, look at the sheet & if it doesn't show the outline of the sticker shapes on there, keep it for your acetate needs! Much cheaper than buying transparency sheets or acetate at the craft store and SO MANY stickers come on these sheets, too! 

Well, that's all for me today, see you again soon :)

xoxox, Noelle

supply list: punches: stamps: Unity; EK Success; microbeads: Martha Stewart Crafts; patterned paper: BoBunny; ribbon, solid cardstock and white craft inkpad: SU!; glitter button: Recollections; ribbon scraps; paper scraps; white embossing powder; heat tool; foam tape: Scotch

DUST IT OFF!: The paper that the snowman and sentiment are on is a scrap from my bin. so is the ribbon making up that fun bow. Also, save the acetate from your sticker sheets for these kind of projects! :)


Girlfriend Cards


Hi there! Another crazy week abounds! July has just been a crazy, CRAZY month! But I'm having some fun girl time with three of my good friends soon, so I thought I'd make them each a cute card. :) These 3 gals are all paper crafters, too, so I know they will like this :)


They are all the same layout, and no stamping on these, just stickers, so they were really fast, too! :) This one (above) is more feminine, for Debby....


This one (above) is more vintage, for Cheri....


and this one is more playful, for Jenny :) 

What do you think? LOVIN' these banner stickers, too cute! And the sentiments were on the same sheet, too :) I hope you like the cards! I'll be back ASAP! 

xoxox, Noelle

supply list: patterned papers: Crate Paper and Sassafrass; banner and sentiment stickers: lilybee designs; yellow letter stickers: Authentique; border stickers: Crate Paper; bakers twine: Crate and Barrel; linen thread: Stampin' Up!

DUST IT OFF!: Who SAYS stickers are only for scrapbooking? With a sheet or 2 of stickers and some scraps of patterned papers, you can make some quick, cute cards! :) 

Tuesday, July 19, 2011

Dashing Through the Snow (JB29 and MOJO200)


Hi there! Excitement abounds as I actually **GASP** play not one, but TWO challenges today! LOL, but in all seriousness, I know things have been preeetty sketchy and sporadic this summer. ;) Kids go back to school very soon so things should improve!  

This card is for the Jingle Belles Reindeer Challenge, though they specify you don't HAVE to use a reindeer, any animal is fine. Also, I used the sketch for Mojo Monday, this is the 200th Mojo sketch! That is so cool and it's a great sketch, too. Here it is: 

I used some super cute DP, the main panel actually has little reindeer all over. Then I used the plaid for the sentiment stamp, which I stamped 4 times. I made my square a little larger and my circle a little smaller than the sketch. Since the stamp said "Dashing through the snow" I used a snowflake DP in the circle and a snowflake felt ribbon along the bottom. The "pop" is that cute glittery reindeer sticker, I used his brother back on this card, you may remember. 


Well, I hope you like my card! I'm pretty happy with this one, it just flowed easily, was a quick card and it's pretty cute, too. I hope you have a wonderful Wednesday! Hubby and I had a date tonight for our anniversary, so that was fun :) 

"see" you soon! 

xoxoxox, Noelle

supply list: stamp: Verve; punches: EK Success; snowflake felt ribbon: Martha Stewart Crafts; glittered reindeer sticker: Jolees Parcel; solid cardstock in Real Red and Kraft: Stampin' Up!; patterned papers: "tinsel" by memory box, inc.


Happy Anniversary! (CQC94)


Hi all! Today is my anniversary! Yep, 15 years ago today I married this sweet man. We had been both high school and college sweethearts (proof that, yes indeed, sometimes these things DO work out!) More on these pics in a minuto.... (sorry, my head is still in Mexico!) but I thought this would be an awesome project to use for this week's colourQ challenge! Check it.....


Ok, so I had these grand plans to make an adorable mini book, maybe a paper bag book or something along those lines, photos of us through the years, etc. BUT cold, hard reality started setting in... Oy, I have SOOOO much going on right now! Craziness! One week to our family reunion, the boys have camps and a host of other stuff going on this week, Ian's got a race next weekend, and on, and on, and on.... and oh, did I mention we just got home from vacation and I'm still not unpacked? Yep, it's one sad state of affairs 'round the ol' homestead this week, so, I decided a commemorative SINGLE page would also be a nice gift, besides I have some things on the walls upstairs that need to be replaced, and even though these colors aren't in our bedroom much, the walls are a light green and I think this will work well in there. I just used an inexpensive scrapbook frame from Michaels. 


So, the page... The bottom photo was taken (no joke!) when my hubby-then-boyfriend was having his HIGH SCHOOL senior pics taken back in 1992 (I know, totally dating myself, sigh) and then the top pic was taken earlier this year. I thought it would be fun to show us as kids and now 20 years later. I made the medallion read "15" for our 15th anniversary, and stamped a sentiment about love. The frame and "Most Beautiful Things" pieces are from a 12" DCWV stack Mod-Retro. The frame piece, actually has the complete wrong colors in the center of the paper, so I just cut the orange frame out and isolated what I wanted to use that way. There's some tips on medallion construction at this post if you are wanting to make one yourself. 


I decided to make a card to match this page. So, I stamped two of the same setiment when I made the page. I inked the top stamp up with multiple markers and added a "Happy Anniversary" stamped in the Razzleberry color. Then, like the page, I matted the sentiment in the Daffodil cardstock. I made a card base from the Tangerine color, and matted a pretty piece of flocked paper as the main panel. I created a bow with some ribbons, wire and a yellow button and added the setiment hanging down from that like a tag. Pretty simple card, but I thought it would be nice to have them matching.


Well, that's it for me today! I hope you'll play along with these pretty colors at colourQ this week! I'd love to see what YOU come up with! Have a stellar day! 

xoxox, Noelle

supply list/card: flocked paper: The Paper Studio; purple ribbon/solid cardstock/sentiment stamp/markers: Stampin' Up!; green ribbon: Hobby Lobby; Happy Anniversary stamp: Hero Arts; yellow button: Crate Paper

supply list/page: patterned papers: DCWV, K&Company, and Stampin' Up!; buttons: Stampin' Up! and Crate Paper; yellow bakers twine: Jillibean Soup; stamps: Stampin' Up! and Hero Arts; sticker: The Paper Studio; frame sticker: Jolees Parcel; silver number stickers: Sticko; solid cardstock, pens and inkpads: SU!; library clip:SU!; punches: EK Success

DUST IT OFF!: those old ribbon scraps work well for a medallion ribbon embellishment. Also, pull out those old DP's to get some use. Even if the whole thing isn't the right color, you can isolate the part you want like I did with the frame. 


Sunday, July 17, 2011

Bright and Cheery Create Yourself!


Hi there! Here's another fun card I created in my "post-vacation-haven't seen-my-supplies-in-a-week" card making frenzy! LOL! Just a "for fun" card, no challenges, etc. 

This card started with the embellishment in the lower corner. I made the flower with 2 layered canvas flowers, aren't those fun colors? Then I stitched the button on with some old red wire. I layered up some plaid DP with some ribbon (actually that is the belt from some old pj pants! I save everything, LOL! They call it "scrap" booking for a reason, right?) For the sentiment I die cut a bright red piece of cardstock with my good ol' Top Note die and I stamped the sentiment on it. Then I layered it over the plaid DP and trimmed the edges. Using it this way gives it the look of a border die or decorative punch instead of the full die. I drew in an extra flower to the right of the sentiment & added 3 yellow flower stickers to cover the stamped ones and a red one to the right of the sentiment, too. 


This has long been my favorite quote. I love it because it's so true. You can be whoever you CHOOSE to be. Besides much of my life has involved creativity, so it's even more precious of an ideal to me. 

Hope you like my happy card! I'm working on some more fun projects and challenges for ya! Have a great day! :) 

xoxox, Noelle

supply list: canvas printed flowers: BasicGrey; button: Crate Paper; die: Sizzix/SU!; stamp: Unity; solid cardstock in Summer Sun, Pacific Point and Poppy Parade: SU!; mini flower stickers: K&Company

DUST IT OFF!: Look at your old dies in a fresh new way, can you cut it apart, layer it? Use it upside down? Also, if you are donating a bag of clothes, take a peek and see if there are any ribbon belts, extra buttons inside the clothes, or other embellishments you might like to use in your creative endeavors! 

Saturday, July 16, 2011

Beachy Keen...


Hey there! Here’s a “Mexico inspired” card for you guys, today. I have this batik swimsuit coverup/sarong thing. Here’s a pic…


I’ve had this for years and always loved the colors and the bleached out look of the sun images. And (actually, as I was lying on the beach in Mexico, wearing this!) I was wondering how I could get the same feel with stamps and papers **insert sound of waves here** and I was thinking of these super-cute fish stamps that I won from my SpottedCanary.com prize package a few weeks ago. And then it occurred to me **move wave sounds** BLEACH! I haven’t stamped with bleach in awhile, and it really is such a cool, fun, and EASY technique to do! To do this just fold up a paper towel, put it on a plate and soak it in Clorox, then use that in lieu of an inkpad. Color safe bleach will not work, you need the real deal here.  Make sure and clean your stamps right after using them with bleach to prevent corrosion or other damage to your stamps. I have also used spray bleach and sprayed cardstock, and that gives a cool look, too. Just be careful of your clothes, etc. just like if you were using bleach to clean your house.


So I took scraps of a variety of papers in blue (solid cardstock). I used Pacific Point (my fave, of course!), Bermuda Bay, Taken With Teal, Not Quite Navy, Marina Mist, Tempting Turquoise, and Brilliant Blue cardstock scraps and I stamped the same striped fish randomly on all the scraps in bleach. So, after I let the bleach dry, I took another fish stamp, this one had detailed scales, and I overstamped the bleached fish with this one, using a Night of Navy ink. SOME of the bleach was not quite dry, and I think that gave the overstamping a softer look, which I like. So, then I cut the scraps into strips that were 4” wide, and I cut them into a variety of thicknesses. I made a card that was 4 ¼” wide and 8 ½” tall. I arranged the strips the way I wanted on a turquoise mat and trimmed as necessary. Then I took some clear epoxy gel (Crystal Effects is the brand I use, but most craft stores sell it by the stamps, it comes in a bottle that looks like glue) and covered some of the fish in it and let it dry. Then I added some border stickers and a stamped banner that I hand cut. A few turquoise gems complete the card. I hope you like it!

 Have a fishy day! ;) xoxox, Noelle

Supply list: stamps: Inkadinkado; cardstock: Stampin’ Up!; gems: Martha Stewart Crafts; border stickers: K&Company; Clorox bleach; inkpads in Night of Navy and Tempting Turquoise: SU!

DUST IT OFF!: Use some old scraps to play with bleach stamping. Each color bleaches out to a different shade, so it’s pretty fun! Then trim your stamped scraps to make a cute card :)


Friday, July 15, 2011

I'm back! Rainbows and Relaxation (CQC93)


Hey there, all! So sorry for the blog delay, I was on an awesome vacay with my hubby in beautiful Cancun, Mexico! Pretty awesome, our 15 year anniversary is next week, so we went on the trip to commemorate. Sorry, I didn’t tell ya beforehand, it was just with the lack of security online, I just didn’t feel comfortable. But we are home now, I was VERY sad to leave the beautiful ocean and time to relax and process all that’s happened recently. Also, SO NICE to be alone with my sweet husband. I am truly blessed. I’m putting a few pics at the bottom of my trip, if you want to see. I am glad to be home, though! I missed my kids, my home, and my blog!
You’ll see some Mexican inspiration in my cards the next few weeks! I came back feeling my mojo flowing again, too! I’ve already made 2 cards today, one is still drying, so I’ll show you tomorrow! THIS card is for this week’s colourQ! The colors are: Real Red, Peach Parfait, Marina Mist, Pear Pizzaz and White. We actually saw a rainbow in the sky as our plane landed in CO Weds. night, so beautiful! I started my card with a DP from MME, a cute polka dot design that was in the Marina Mist and white tones. I cut some half rainbows in the challenge colors with my rainbow die from Lil' Inker Designs I cut white clouds from the same die set, and outlined them with a black pen. I stamped my Verve sentiment on the bottom of the DP, and that was pretty much it for this card. CAS and I love it!

Thanks for popping by! I hope you’ll play along before the colourQ linky expires! Have a stellar day! Xoxox, Noelle

Supply list: stamp: Verve; rainbow/cloud die set: Lil’ Inker; patterned paper: My Mind’s Eye; solid cardstock in challenge colors: Stampin’ Up!; black pen; black dye inkpad

at dinner one night

On the ferry to Isla de Mujeres, that's Cancun in the background

La Iguana, these guys are all over the place!

Off the coast on the Isla

Mayan Ruins

We swam with dolphins, too. Totally amazing experience! 


Wednesday, July 6, 2011

Here fishy, fishy....

Hey all, sorry AGAIN for my absence, buuuut, I think it may just be something you have to get used to until the kids get back to school. I hate being sporadic at best, but such is life when it's summer and I am more-than-full-time momming. 

This is a thank you card for a friend. I pulled out some more new goodies from my SpottedCanary.com prize package win! Aren't these Patterned Fish so cute and summery? I (heart) them, so cute! I also used the brayer I won in my prize, too. Just the plain brayer this time. I started with a glossy white rectangular piece and layered up my brayer with three colors of ink: Tempting Turquoise, Bermuda Bay and Pacific Point, you can see the pretty watery effect that gave to the background. I took a flower stamp from another Inka set, Mod Flowers and used that to stamp some "seaweed" over the water panel with a StazOn Timber Brown inkpad. I stamped my fish on white cardstock in a variety of ink colors, and then spritzed them with different glittery sprays to color and sparkle them up. Then I cut out the fish and added some Diamond Stickles for more glitz. 
I used gems for the fishes eyes, and I stamped the sentiment (retired SU!) on some DP and cut it out. And that's it! A bit different than many of my cards lately, but it was fun and I think the fish are pretty. I think my friend will like it, too. 

Well, that's all for me today! I hope YOU are having a great summer that is, perhaps, somewhat less busy than mine? LOL! Have a great one! 

xoxoxox, Noelle

supply list: stamps and brayer: Inkadinkado; inkpads in Tempting Turquoise, Pacific Point, Bermuda Bay, Poppy Parade, Brilliant Blue, Pumpkin Pie and Wild Wasabi: Stampin' Up!; cardstock in glossy white, Daffodil Delight, and Poppy Parade: SU!; sentiment stamp: SU!; Timber Brown inkpad: StazOn; Diamond Stickles; Smooch Spritz in Gold and Diamond; Blue pigment glitter spray: Tattered Angels; gems: assorted manufacturers

DUST IT OFF!: That sentiment stamp is really old and went with a "beach" set, so perfect for this card! Also, amazing the colors and unique looks you can create with just inkpads and an old-school brayer. Pull yours out if you have one! I just inked mine up with "stripes" Turquoise ink covered 2/3, and the Bermuda ink covered half of the Turquoise ink. Then the Pacific Point ink covered the remaining 1/3 of the brayer surface, so similar to the old Spectrum Pads. Using complementary colors like this gives a lot of depth and is so much more interesting than just using blue paper, I think. If you give it a go, comment here and I'll come check out your project, too! 

Tuesday, July 5, 2011

Elitch Gardens Scrapbook pages (CQC #92)


Hey all! time for a FUN and summery color combo at colourQ this week! Check it.....


I had fun with these pages! Great pics from our trip to Elitch's (our local 6 Flags type amusement park) last summer! 

I started with the diagonal strips, the paper is actually printed like that, and I cut out strips isolating the colors I wanted to use. I taped them down to the 12"orange cardstock and stitched the edges with black thread using my sewing machine. Then I added my sticker letters for the title and date to the 2 top strips. The diagonal strips worked SO well, because they really contribute to the flow of the page, helping move your eye from left to right. See what I'm talking about?


I decided to arrange my pics by where we had been in the park. Each "area" is matted on green cardstock and border punched. Then I added my journaling per green block. 


On the ice cream shop block I added some ice cream print paper. To the first page I added a cute Jolee's rollercoaster sticker and a cardstock sticker. To tell you how committed I am to the colourQ palette, I actually peeled the tiny cars off of the rollercoaster sticker and colored the rollercoaster to match my page! LOL, I KNOW it's a little nuts, but the powder blue coaster just looked all wrong! Don't you think it's cuter in turquoise? 

Well, that's all for me today, I hope you'll come play with us at colourQ this week! I always love to see what you come up with! 

Have a stellar day! xoxox, Noelle

supply list: Striped paper: MME; ice cream paper: We R Memory Keepers/Archivers; solid cardstock: SU!; black letter stickers: American Crafts; cloud rub-on: Basic Gray; Theme Park sticker: The Paper Studio; rollercoaster sticker: Jolee's; turquoise epoxy stickers: Sticko; border punch: EK Success; let's go sticker: K&Company; sentiment stickers (on photos): Reminisce; sewing machine & black thread

DUST IT OFF!: Those sentiment stickers are REALLY old and actually from a "park" themed sheet. But "In the swing of things" and "merry go round" fit well here, too! Also, that chipboard sticker is really old. And, if you have the perfect THEME of sticker, but the wrong color? See if you can somehow color it or alter it to make it work for your needs! Stickers can be tricky when you're trying to stick with a certain color theme, but let that STRETCH your imagination on how to solve the problem! :)


Sunday, July 3, 2011

Happy 4th!!! :)


Happy 4th of July to all my other American friends! I don't have a card for you today, but I thought you might like to see some other fun stuff I've been up to... Last week my nephew flew over the handlebars on his bike and knocked his 4 front teeth clean out. Poor kid had to be rushed to the ER, after he was feeling better with some pain meds, he told his mom he was sad that they were putting his real teeth back in and he wished they could put in shark's teeth or crystals in his mouth instead.... That just CRACKED me up, such a great "kid" moment in the midst of all the scariness of the ambulance ride and ER visit. He is on the mend now, though it looks that they'll be having a lot of dentist appointments in the future. So, I had seen this super cute idea for a shark watermelon on Pinterest, and I thought it might cheer him up a bit, and since he can only eat soft foods, watermelon should be a good fit! The blog this was "lifted" from is Sun Scholars, check it out! There's a great photo tutorial over there if you would like to make your own shark watermelon!

Also, I decided to make these fun sandwich cookies:


Just used those premade cookies that you bake with the flags, and then made a filling from low-fat cream cheese (neufatchel) and powdered sugar. Piped the filling on a cookie with a plastic bag and then added the top cookie and smashed. On some of then I rolled the edges in sprinkles, I think the kids will get a kick out of these too! (and they are ALSO soft, yea!) 

The other thing I'm bringing to the BBQ is my homemade guacamole, which is usually scraped clean by the time I leave any party. The secret is KISS, and that makes it pretty HEALTHY too.

4 avacados
2 guacamole spice packets 
2 fresh lemons 

I smash the avacados with a potato masher, then juice the lemons in right on top of that and then stir in the spices. It's best if you can let it sit in the fridge 4-24 hours before serving so the spices have time to fully get absorbed by the avocado. The fresh lemon juice keeps it nice and green, I personally will not eat guacamole if it's brown, eeeew. 

I'll leave you with a pic of my Liberty Banner, in case you missed it the first time. Have a wonderful 4th! I feel so very blessed to be born an American!


xoxox, Noelle


2B or not 2B?


Hey there blog friends..... In a bit of a reflective mood last night, and I thought I'd share a little bit where this project came from. The last entire year, has been kind of tedious in my world. There has just been a lot of stress, and as it goes.... one stress ends and another one just comes in to take it's place. Some of it is too personal to share here, but I've made some tough, but extremely necessary calls to change my life in the last year. I haven't had regrets, but that doesn't make major change a piece of cake, even when you know you're doing the right thing. Additionally, there's been a car accident, an ER/choking incident with Ev, a broken arm for Ian, serious health problems for one of my parents, an injury and rehab for my grandmother, plus many close loved ones have shared with me some of the serious personal struggles they are also facing..... long, long, LONG year, to say the least. There is even more, but much of it cannot be shared here. And no, it's not all been about me, or things that have happened directly TO me, but I can say it's all affected me. But oddly, it seems almost necessary for all this massive upheaval to be going on, if that makes sense. Even 6 months ago I felt so extremely different about myself. I did not believe I was capable of getting the job I wanted, getting in shape, juggling all my responsibilities, handling the endings of things I'd known for years. In the short term, I did not believe in ME, my ability to handle the "seasons of my life," and I wasn't even sure where I had gone. Certainly, like most people I've faced some other serious times of trial in my life before now. But I felt defeated, lost, and not quite sure how I could keep up with my own existence some days.


So, there's been a lot of good and positive things that have come out of all of this. I take care of myself now. I eat right, I work out, I can even run now. I am stronger, smarter about my relationships and I don't take my wonderful husband and kids for granted anymore. I know my blessings & I appreciate how many people love me and care about me. I'm stronger emotionally, too. I also believe that I'm capable of making my dreams come true. And that's half the battle anyway. Believing. 


So, I've been watching the new series on OWN "Finding Sarah" and I have been so intrigued, because I really have felt that some of the reason things spiralled so out of control for me these last few years is because I got so caught up in everyone else, helping others, taking care of my kids, my husband, my friends. To certain extent, the reason I did that was because I didn't want to face the past, some bad and difficult things had happened, I was afraid to face them, afraid I couldn't take the pain. I was hiding from my past by focusing elsewhere. And then it just snowballed, so many of the things I'd been avoiding dealing with crept into my life in other ways. It's true that the universe will keep teaching you a lesson until you finally GET IT. On one of the episodes with Fergie and Dr. Phil he tells her "You are addicted to approval and acceptance." I truly sat there with my jaw dropped. Wow. Yeah, that is definitely me in a nutshell, too. Thanks Dr. Phil for saving me thousands of dollars in therapy with that little gem. Basically, he told her that because she'd been rejected as a child, she'd spent the rest of her life looking to fill that "high" of being accepted, approved of, the favorite, the loved one, the cheerleader, the rock.


So, I'm learning about me and learning to support others because I love them. NOT because I feel I have to, or they will think less of me, or it's the "right" thing to do. I don't sign myself up to do things I'll complain about later anymore. That's not to say I can't be a great mom, wife, or friend with my new outlook, nor does it give me a right to be nasty and selfish. It's just learning to do the things that are motivated by GOOD and by LOVE. Because, I'm finding, when it comes from a place of love, you don't feel irritated, or taken advantage of, or beaten up like you do when you do it from a place of requirement, guilt, or avoiding someone's anger. So, I know getting very wordy here..... (but, hey, it's my blog, right?) ;) long story short, I have reframed my beliefs about myself and that's been HUGE and important. Who woulda thunk 10+ years of growth could happen in less than a year, right? So, it's been a lot but in a very, very good way.

So, that's the story behind my sign. I'm new, freed from my self-imposed cage, and growing every day. Just like the sign says "I am learning to be me." And that is just where I am today, learning, living without regret, and finding that those who really love you will always think you are enough. But you have to think it FIRST. Visual reminder in my little sign, and I added the date in for a reminder, so I can look back and say "Wow. Remember 2011? That was such a crazy year, but I came so far."

Well, thanks for reading my long post.....as my Papa would've said.... "That's my story and I'm sticking to it!" Have a wonderful day, I hope it comes from a place of love.

Noelle

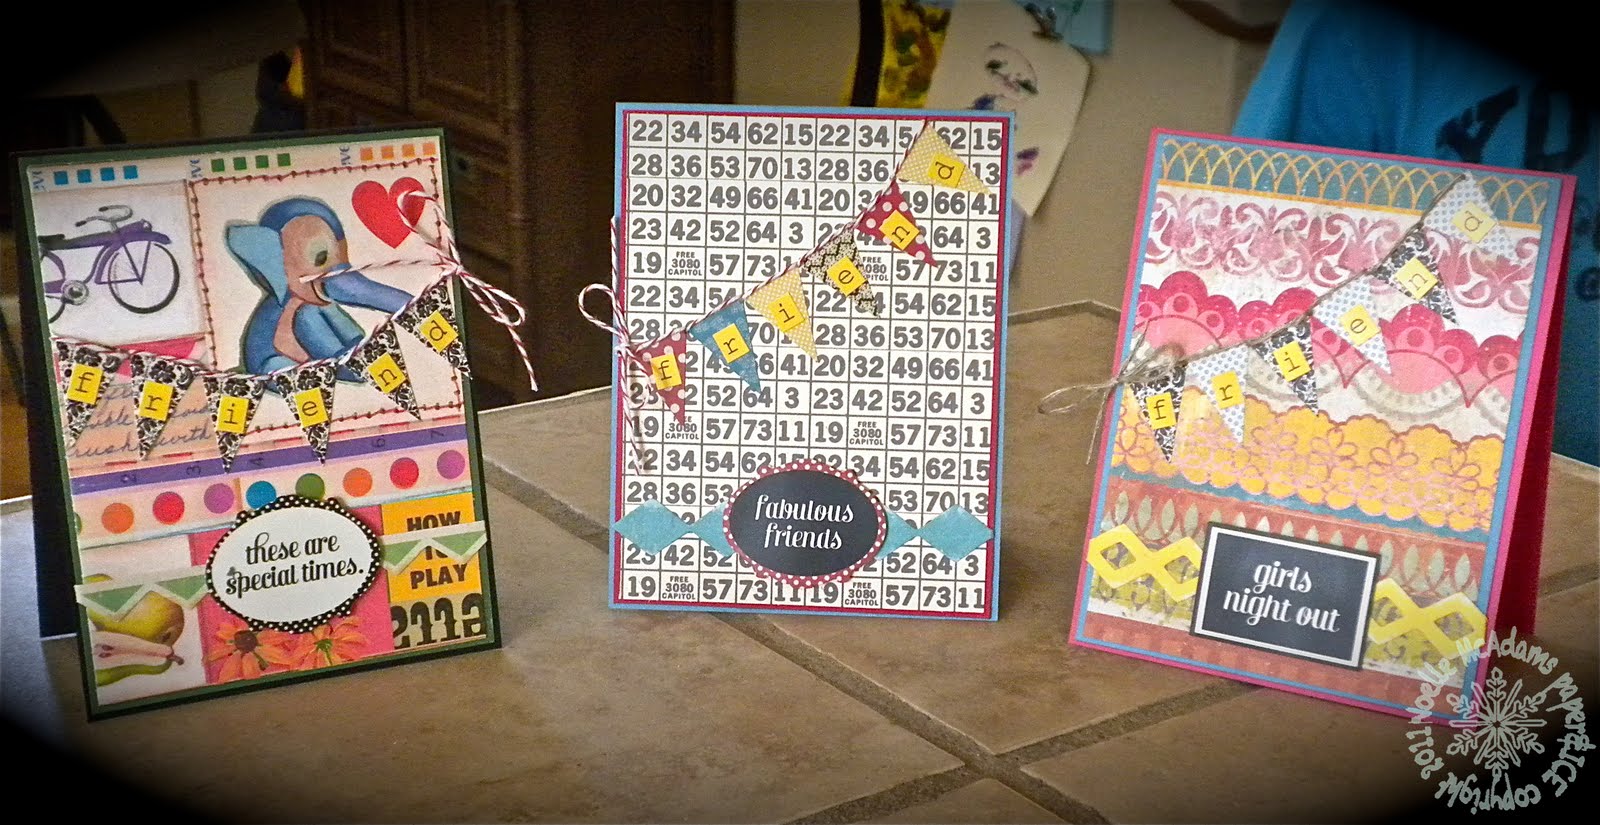
supply list: stamps: Unity/Melody Ross; DP: Sassafrass; Bean Sprouts #2 journal circle: Jillibean Soup; punch: EK Success; border stickers: Crate Paper; epoxy/glitter brads: BoBunny Press; letter/number mini stickers: Authentique; pennant stickers: lilybee designs; brass rivets and metal #2 tab: 7 gypsies; ribbon: The Ribbon Boutique/Hobby Lobby; date stamp: K&Company/SMASH